Sunday, July 14, 2013

A journey into the unknown...

In a few months I will be making a wedding cake for a dear friend...
I've only made a couple cakes in my whole entire lifetime! So I'm slightly nervous. I keep brainstorming on which way I want to go. Sometimes I think it would be easiest to go with pre-rolled fondant, and other times I think I would like a more free-hand frosting effect. One thing I know for sure is that I want to use a small/light arrangement or spray of live flowers. I think the couple would like that best decoration wise.

When you google image search 'homemade wedding cakes' you get some "Okay, I could possibly do that," results, and others that you know a near professional made. And then there are the search results that make you cringe and think "Oh dear! Please tell me my cake will look nothing like that!"

While I am prepared to do a practice cake or two, especially to try some different decoration techniques, I'm still nervous about the end result. I'm a cupcake girl! If I can put it in a paper liner and bake it, I'm absolutely brillant at it. At the reception there will be a dessert bar within the catering, so no cupcakes in lieu of a cake, (believe me that was the first thing I suggested) they need the ceremonial cake to cut. 

So obviously I have been google image searching like crazy for simple but classic decorating ideas. I know getting the cake layers baked and put together with the filling will be the easy part, the beautiful decorating that needs to go on the outside is a whole other story. So here are some images I am drawn to for ideas on how I might be able to achieve a decent looking finish:

  I absolutely love how playful this cake is, and how interchangeable the cookies on the outside could be. While this beauty is three tier, I am most likely only making two tiers for the reception and a seperate top piece to hold for the couple to take home with them for their one year anniversary.

I love the height and proportion of each layer of this cake, it's perfect. The outside is crumbed, which I have never personally seen, but I do like the effect. The pink ribbon would not be included. I would rather have some small (possibly edible) purple and blue flowers on top sprinkled around the middle and bottom as well.


I love the ruffle effect, and obviously the gradient blue is amazing (though I am unsure how attainable for me it is). The fresh flowers on top are a great contrast to the blue, softening it so much.


I love the clean, classic look of this type of design. For this I would need to use fondant...Which I have never used. I know that they have pre-rolled fondant now that seems like it is pretty simple to use. And the look with this design and fresh cut flowers is amazing!

These were the best results I could find of a spread frosting. The Chocolate one is a bit more "messy" than I would like, but I love the contrast between the color of flowers and the frosting.

I like the ribbon effect, and I also think it would maybe be somewhat easy for me to master. It is a bit more girly than I would like to go for, but maybe if done on just the top layer, with a simple spread effect on the bottom layer it would be just balanced enough.


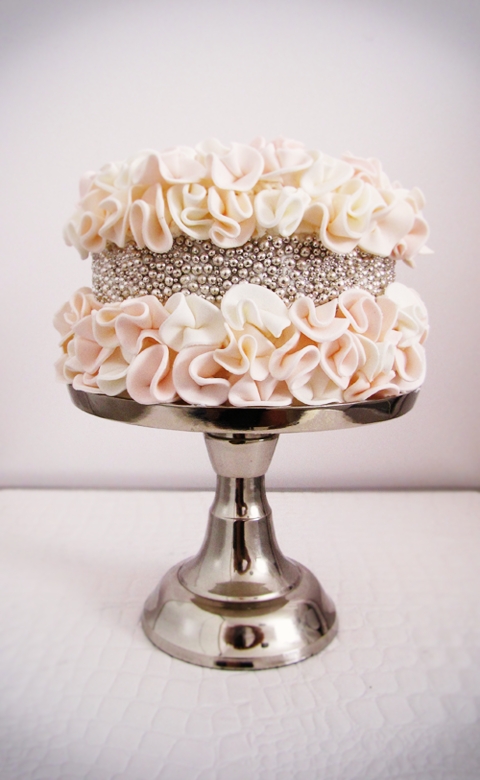
And these last three are examples of search results that I got that I felt were way above and beyond my skills, but I still love because they are so beautiful. Albeit, they all are way to girly for the wedding I'm making my cake for.

Well, back to Google Search!

Mini Brownies with Marshmallow & Mocha-Cream Cheese Frosting

I had a request for my mini brownies with vanilla pudding filling and mocha frosting for a baby shower that I was going to yesterday. When I went to make them I decided to change up the recipe slightly, as I had marshmallow fluff that needed to be used and I thought it would go just as well as the pudding had (looking back at my blog I am realizing I never put that recipe on here, so at the end of this recipe I will make a side note of what to do for the original recipe as well).

The original brownies were an absolute hit and these went over just about as well too!

Ingredients:

  • 1 box of your favorite brownie mix
  • Water, Oil and Eggs as directed on the back of the box
(Add the extra egg it tells you to to make the brownies cake-like)
  • 1 jar marshmallow fluff (you won't use the whole thing, maybe 3/4th)
  • 4 oz softened cream cheese (1/2 an 8oz box)
  • 1 can cream cheese frosting of your choice (you'll use 1/2 to 3/4 of it)
  • 1 pkt of Duncan Hines Frosting Creations Flavor Mix - Mocha
What to Do:
  • Make the brownie mix as specified on the back of the box for cake like brownies, line mini cupcake/muffin tins with paper liners.
  • Pre-heat oven to 350*, fill paper liners 3/4 of the way full with brownie mix, bake for approx. 15-20 minutes depending on how your oven cooks. Brownies are done when a toothpick inserted into the center comes out clean. Place to side to cool. Mix will make approx. 48 mini brownies.
  • For frosting, take 1/2 of the cream cheese frosting out of the can and place in small bowl. Add in the softened 4oz cream cheese. You can either mix these two together by hand or with an electric mixer. Add more of the frosting if you would like the frosting sweeter, once you have the desired taste you want between the frosting and cream cheese add in the Mocha Flavor Packet. Once this is throughly mixed in you will need to place back in the fridge for a few hours (or freezer if your short on time) to firm back up.
  • Once brownies are completely cool, take a knife or super small round cookie/fondant cutter (like this)


 and cut out the centers of each brownie (approx 1/2 way down).
  • Place marshmallow fluff (1/2 - 3/4 of the tub/jar) in piping bag with a tip that has a wide, round opening (you can also use a plastic ziploc bag with the corner cut off, or a piping bag with no tip, just the bottom snipped off). Pipe marshmallow filling into hole in each brownie. Keep piping bag with any leftover marshmallow fluff still in it.
  • Once frosting has set back up to a firmer consistency (if you don't wait for it to set up it will literally be running down your brownies), place into piping bag with your desired decorative tip and pipe onto the top of each brownie.
  • With leftover marshmallow fluff, pipe small amounts into center of frosting.
  • Garnish with sprinkles or sanding sugars of your choice

So for the original version of these I got a small box of instant vanilla pudding and made it according to the PIE directions on the side. I let that set up in the fridge and then piped it into the center instead of the marshmallow fluff. Then I just put the frosting on top in a prettier design than the ones above (since I wasn't putting the extra dallop on top) and sprinkled the tops with something pretty. Both versions will need to be refrigerated until shortly before serving, which I have found makes the cupcake liners start to pull away from the brownies, but you don't want anyone getting sick! Though I'm all about baking from complete scratch when you can, everyone has times when they need to shorten the process and finish quickly. This recipe allows you to be creative, but you'll get almost everything done within the first hour (except for the piping of the frosting & decorating, which you could do right before serving/taking these to an event). I'm still looking for a good brownie mix to make from scratch, the box mixes just always seem to come out the best!

Anyways, hope you enjoy!