Thursday, February 20, 2014

Fudgy Brownies

I've finally found a brownie recipe that I like! I didn't get a picture of the end result, but figured I would share the recipe with you none the less. I added some marshmallow cereal pieces to the top of the brownies about half way through the baking process to give it a little something extra. My only concern with doing this was I didn't have them pre-sorted, so as I was trying to rush and dig them out of the cereal I didn't have enough time to get as many as I wanted to. Even with waiting until half way through the baking process, the marshmallows slightly over baked and became weird. So next time I think I will wait a bit longer to put them on. Anyhow, here is the recipe I used:

Ingredients:
10 Tblspns unsalted butter (not necessarily at room temp)
1 1/4 cups sugar
3/4 cup + 2 Tblspns unsweetened cocoa powder
1/4 rounded tspn salt
1 tspn vanilla extract
2 lrg eggs - cold
1/2 cup flour

Directions:

Position an oven rack in the lower third of the oven & heat to 325°. Grease 8×8 pan (or line with parchment paper, leaving a slight overhang for easy release).

Add water (1-2 inches) to a medium saucepan, heat until barely simmering. In a medium, heat safe bowl, directly on top of the simmering saucepan of water, combine butter, sugar, cocoa powder, & salt. (If the bottom of the bowl touches the water you'll need to pour some water out). Stir mixture occasionally as the items heat up until the butter melts and the whole mix is quite warm/hot (it will look gritty which is fine, it will get smooth later on).

Remove the bowl from the saucepan and set to the side for 3-5 mins, letting it cool down to just warm.

Stir in the vanilla with a large spoon or spatula.  Then add the eggs one at a time, stirring vigorously after each. When the batter looks thick, shiny & well blended,  add the flour and stir until fully incorporated. Beat 40-50 additional strokes, the batter will be quite thick. (If you want to add nuts or something, nows the time to stir them in)

Pour into prepared pan and bake 20-25 minutes.  Check with toothpick, insert it in the center, it should come out clean. Cool completely before removing from the pan.

While these brownies tasted devine, they fell apart when I was cuting them up. I think I under baked them just a bit, making them messy to eat. I also used the wrong size pan which made them super thin. A small square pan (as the recipe calls for) would have been ideal. All in all I give them two thumbs up and will definitely make them again!
Sunday, July 14, 2013

A journey into the unknown...

In a few months I will be making a wedding cake for a dear friend...
I've only made a couple cakes in my whole entire lifetime! So I'm slightly nervous. I keep brainstorming on which way I want to go. Sometimes I think it would be easiest to go with pre-rolled fondant, and other times I think I would like a more free-hand frosting effect. One thing I know for sure is that I want to use a small/light arrangement or spray of live flowers. I think the couple would like that best decoration wise.

When you google image search 'homemade wedding cakes' you get some "Okay, I could possibly do that," results, and others that you know a near professional made. And then there are the search results that make you cringe and think "Oh dear! Please tell me my cake will look nothing like that!"

While I am prepared to do a practice cake or two, especially to try some different decoration techniques, I'm still nervous about the end result. I'm a cupcake girl! If I can put it in a paper liner and bake it, I'm absolutely brillant at it. At the reception there will be a dessert bar within the catering, so no cupcakes in lieu of a cake, (believe me that was the first thing I suggested) they need the ceremonial cake to cut. 

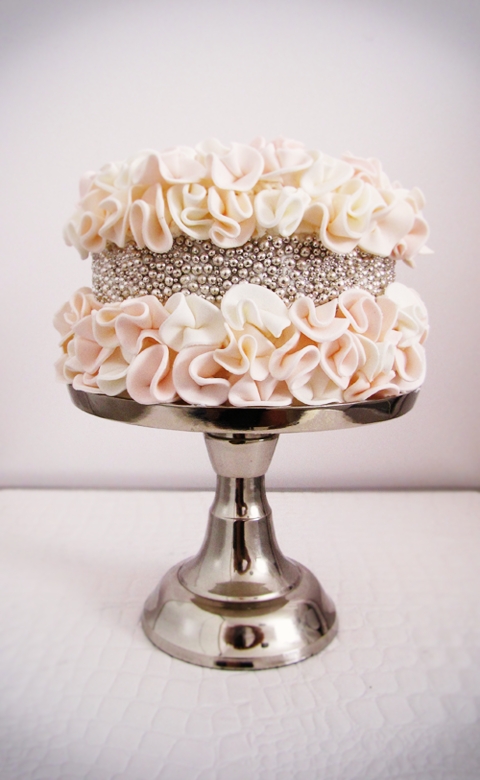
So obviously I have been google image searching like crazy for simple but classic decorating ideas. I know getting the cake layers baked and put together with the filling will be the easy part, the beautiful decorating that needs to go on the outside is a whole other story. So here are some images I am drawn to for ideas on how I might be able to achieve a decent looking finish:

  I absolutely love how playful this cake is, and how interchangeable the cookies on the outside could be. While this beauty is three tier, I am most likely only making two tiers for the reception and a seperate top piece to hold for the couple to take home with them for their one year anniversary.

I love the height and proportion of each layer of this cake, it's perfect. The outside is crumbed, which I have never personally seen, but I do like the effect. The pink ribbon would not be included. I would rather have some small (possibly edible) purple and blue flowers on top sprinkled around the middle and bottom as well.


I love the ruffle effect, and obviously the gradient blue is amazing (though I am unsure how attainable for me it is). The fresh flowers on top are a great contrast to the blue, softening it so much.


I love the clean, classic look of this type of design. For this I would need to use fondant...Which I have never used. I know that they have pre-rolled fondant now that seems like it is pretty simple to use. And the look with this design and fresh cut flowers is amazing!

These were the best results I could find of a spread frosting. The Chocolate one is a bit more "messy" than I would like, but I love the contrast between the color of flowers and the frosting.

I like the ribbon effect, and I also think it would maybe be somewhat easy for me to master. It is a bit more girly than I would like to go for, but maybe if done on just the top layer, with a simple spread effect on the bottom layer it would be just balanced enough.


And these last three are examples of search results that I got that I felt were way above and beyond my skills, but I still love because they are so beautiful. Albeit, they all are way to girly for the wedding I'm making my cake for.

Well, back to Google Search!

Mini Brownies with Marshmallow & Mocha-Cream Cheese Frosting

I had a request for my mini brownies with vanilla pudding filling and mocha frosting for a baby shower that I was going to yesterday. When I went to make them I decided to change up the recipe slightly, as I had marshmallow fluff that needed to be used and I thought it would go just as well as the pudding had (looking back at my blog I am realizing I never put that recipe on here, so at the end of this recipe I will make a side note of what to do for the original recipe as well).

The original brownies were an absolute hit and these went over just about as well too!

Ingredients:

  • 1 box of your favorite brownie mix
  • Water, Oil and Eggs as directed on the back of the box
(Add the extra egg it tells you to to make the brownies cake-like)
  • 1 jar marshmallow fluff (you won't use the whole thing, maybe 3/4th)
  • 4 oz softened cream cheese (1/2 an 8oz box)
  • 1 can cream cheese frosting of your choice (you'll use 1/2 to 3/4 of it)
  • 1 pkt of Duncan Hines Frosting Creations Flavor Mix - Mocha
What to Do:
  • Make the brownie mix as specified on the back of the box for cake like brownies, line mini cupcake/muffin tins with paper liners.
  • Pre-heat oven to 350*, fill paper liners 3/4 of the way full with brownie mix, bake for approx. 15-20 minutes depending on how your oven cooks. Brownies are done when a toothpick inserted into the center comes out clean. Place to side to cool. Mix will make approx. 48 mini brownies.
  • For frosting, take 1/2 of the cream cheese frosting out of the can and place in small bowl. Add in the softened 4oz cream cheese. You can either mix these two together by hand or with an electric mixer. Add more of the frosting if you would like the frosting sweeter, once you have the desired taste you want between the frosting and cream cheese add in the Mocha Flavor Packet. Once this is throughly mixed in you will need to place back in the fridge for a few hours (or freezer if your short on time) to firm back up.
  • Once brownies are completely cool, take a knife or super small round cookie/fondant cutter (like this)


 and cut out the centers of each brownie (approx 1/2 way down).
  • Place marshmallow fluff (1/2 - 3/4 of the tub/jar) in piping bag with a tip that has a wide, round opening (you can also use a plastic ziploc bag with the corner cut off, or a piping bag with no tip, just the bottom snipped off). Pipe marshmallow filling into hole in each brownie. Keep piping bag with any leftover marshmallow fluff still in it.
  • Once frosting has set back up to a firmer consistency (if you don't wait for it to set up it will literally be running down your brownies), place into piping bag with your desired decorative tip and pipe onto the top of each brownie.
  • With leftover marshmallow fluff, pipe small amounts into center of frosting.
  • Garnish with sprinkles or sanding sugars of your choice

So for the original version of these I got a small box of instant vanilla pudding and made it according to the PIE directions on the side. I let that set up in the fridge and then piped it into the center instead of the marshmallow fluff. Then I just put the frosting on top in a prettier design than the ones above (since I wasn't putting the extra dallop on top) and sprinkled the tops with something pretty. Both versions will need to be refrigerated until shortly before serving, which I have found makes the cupcake liners start to pull away from the brownies, but you don't want anyone getting sick! Though I'm all about baking from complete scratch when you can, everyone has times when they need to shorten the process and finish quickly. This recipe allows you to be creative, but you'll get almost everything done within the first hour (except for the piping of the frosting & decorating, which you could do right before serving/taking these to an event). I'm still looking for a good brownie mix to make from scratch, the box mixes just always seem to come out the best!

Anyways, hope you enjoy!

Sunday, July 15, 2012

S'Mores Cupcakes with Nutella


 I have found the cupcake Mecca!
And no, I will never go back to plain ol' cupcakes ever again.

After the Lemon-Marionberry-Lavender creations my mind has been awhirl with thoughts on new ideas for more cupcakes.

I knew after "S'Mores" came to mind that it had to have already been done. Which it has, but most of the recipes I found online called for chocolate ganache. Now I must say I have nothing against ganache. But it seemed so simple, plain almost.

And that is when I remembered that my favorite way to make S'Mores isn't with a chocolate candy bar but with Nutella!
 Frosting made from Nutella! Genius! And I was also wasn't the first to come up with this either. So I married a recipe for Nutella Frosting, and a recipe for graham cracker cupcakes and piped them with marshmallow creme... They are devine!

Ingredients:

Graham Cracker Cupcakes:
  • 11/2 cups graham cracker crumbs.
  • 1/2 cup cake flour.
  • 2 1/2 teaspoons baking powder.
  • Pich of salt.
  • 1/2 cup (1 stick) unsalted butter, softened.
  • 3/4 cup sugar.
  • 2 large eggs.
  • 1 teaspoon vanilla extract.
  • 3/4 cup milk.


Filling:
  • Marshmallow Creme (1 can should be enough)


Frosting/Topping Ingredients:
  • 1/2 cup unsalted butter
  • 1 cup Nutella
  • 1 1/2 cups powdered sugar
  • Milk/Cream
  • Teddy Grahams


Directions:
  1. Preheat oven to 350 degrees & line cupcake/muffin pans with paper liners.
  2. In a medium bowl mix together graham cracker crumbs, flour, baking powder & pinch of salt. Set aside.
  3. In a large bowl beat butter & sugar until light & fluffy.
  4. Add eggs into butter mixture one at a time, blending well after each.
  5. Beat in Vanilla.
  6. Alternatingly add part graham mixture & milk until all is blended together into large bowl.
  7. Pour into lined pans and bake. 22 minutes for standard size cupcakes, 14 minutes for mini cupcakes (or a toothpick comes out clean).
  8. Cool completely.
  9. Cut out hole in center for piping marshmallow creme into.
  10. Put  marshmallow creme into a quart ziploc bag, seal and cut off one corner the size of the whole in your cupcake. Pipe creme into cupcakes.
  11. With mixer on high, beat butter & Nutella until evenly combined. Add powdered sugar 1/4 cup at a time, mixing well after each. Add milk/cream as/when needed to reach desired consistency (I used Heavy Whipping cream).
  12. Put Frosting into decorating bag with desired tip and pipe onto cupcakes.
  13. Garnish with a Teddy Graham.
  14. Enjoy!

Wednesday, July 11, 2012

Lemon-Marionberry-Lavender Mini-Cupcakes


Lemon Cupcake with Marionberry-Lavender Preserves 
and Lavender flavored frosting:

I LOVE Lavender. I know that most people don't really like it other than for its sweet aroma. But I personally could eat lavender flavored food/sweets/candy all day long. So I was thinking one day, "How can I incorporate lavender into a cupcake?" And I just kept thinking about it until I thought, "A lemon flavored cupcake with lavender flavored frosting would be devine!"

So of course I had to Google it and see if anyone had a recipe I could use to make it all happen. All the recipes I found either had way to many steps or were to complex for my patience/expertise. I also found a farm in Hood River that had culinary lavender and Marionberry-Lavender preserves in their online store, so I ordered those, but figured they wouldn't arrive as quickly as I would like.

And then I found these on Sur La Tables website 
(and then went to the store and bought them):
Lemon Extract (which I am pretty sure you can 
get at any grocery store as well) and Lavender Extract!
So I figured if I took a basic vanilla flavored cake recipe but substituted the lemon extract for the vanilla extract it would suffice. And if I took a basic vanilla frosting recipe and replaced the vanilla with the lavender extract I would be good to go.

I was surprised that my culinary lavender and Marionberry-lavender preserves got to me within two days of me ordering them. Well now I could put some of the preserves into my cupcakes as well. 


So here is how to make my lovely little creations:

Lemon Flavored Cupcake Ingredients:
  • 1 1/4 cups cake flour
  • 1 1/4 teaspoon baking powder
  • 1/2 teaspoon baking soda
  • 1/2 teaspoon salt
  • 2 eggs
  • 3/4 cup sugar
  • 1 1/2 teaspoons lemon extract
  • 1/2 cup oil (I used vegetable oil)
  • 1/2 cup buttermilk 
(which I was out of so I used whatever milk was in the fridge)


  1. Preheat oven to 350 degrees, prepare muffin/cupcake pans with paper liners.
  2. 1st bowl: Mix together cake flour, baking powder, baking soda and salt.
  3. 2nd bowl: With electric mixer, beat eggs 10 - 20 seconds. Add sugar and beat on medium speed for 30 seconds. Add lemon extract and oil. Beat together.
  4. Reduce speed to low, alternately mix in flour mix and milk into first bowl, beat until just combined. Scrap down bowl. Batter will be thin. Fill paper liners 2/3 full with batter and bake 12 - 14 minutes. Cool in pans 1 - 2 minutes. Remove and finish cooling on wire racks.


Lavender Flavored Frosting:

  • 1/2 cup (1 stick/8 tablespoons) butter, softened.
  • 8 oz. of cream cheese, softened.
  • 1 teaspoon Lavender Extract (more or less to taste).
  • 4 cups powdered sugar.
  • 1 - 4 tablespoons heavy whip cream.
  • Food Coloring (use directions on box to achieve a purple color)

  1. Place butter in bowl, blend slightly. Add cream cheese and blend until combined, about 30 seconds.
  2. Add lavender extract and powdered sugar and blend on low until combined. Increase to medium and beat until fluffy.
  3. Slowly add whip cream until desired consistency is met, beat until fluffy.
  4. Mix in food coloring with mixer to achieve a purple/lavender color.


Putting the Cupcakes together:

  • Cut out holes in the cupcakes and pipe marionberry-lavender into holes. Or pipe preserves directly into the cupcake with approriate decorating tip stuck straight down into the cupcake.
  •  Frost cupcake with Lavender frosting in a decorating bag with your favorite decorating tip or in a ziploc bag with a bottom corner cut off
  • You can use yellow dusting sugar/sprinkles for decoration, edible flowers, really anything. I had wanted to use some of these candies to put on the top but couldn't find them anywhere I went.


Mini Peanut Butter & Jelly Cupcakes


I made these cupcakes for my family reunion/bbq...
There was a slight problem with my thinking when I made these.
The recipe I found online was for regular size cupcakes, and when you make mini cupcakes instead of the regular size ones, you can expect the recipe to make almost three times as many cupcakes...
Nevertheless I still proceeded to almost triple my recipe...
I had around 200 mini cupcakes when I meant to only make 80!

But dang were they good!
If you like Peanut Butter and Jelly sandwiches you will love these cupcakes.


Heres how to make them:

Cupcake Ingredients:
  • 6 tablespoons (3/4 stick) unsalted butter, softened.
  • 1 cup smooth or crunchy peanut butter (I chose smooth).
  • 1 1/3 cups firmly packed light brown sugar.
  • 3 large eggs.
  • 1 tablespoon vanilla extract.
  • 3 cups cake flour 
(I must digress at this point to let you know that the original recipe called for all-purpose flour, but I had read online that using cake flour is better for cakes and the like. So I substituted it in to see if there was a difference. The cupcakes seemed a bit more dense and moist. So from now on I will use cake flour in my cake recipes).
  • 1 tablespoon baking powder
  • 1 teaspoon salt
  • 1 cup buttermilk
(Another digression: the recipe called for milk. But as before I had read online that buttermilk helps the cupcake with density and moistness. If you can splurge on buttermilk go for it, but if not use whatever milk you have in the fridge).
  • strawberry or grape jelly (well any jelly really, just don't get anything with chunks in it as you will be piping it and chunks will clog the tip).

Cupcake Instructions:
  1. Preheat the oven to 350 degrees. Line your muffin/cupcake pan(s) with paper liners.
  2. In a large bowl cream together the butter, peanut butter, and brown sugar with an electric mixer on medium speed until fluffy, about 3-5 minutes. Add the eggs one at a time. Beat well. Mix in the vanilla.
  3. In a separate bowl combine the flour, baking powder and salt.
  4. Add the dry ingredients to creamed mixture, alternating with the milk. Mix well.
  5. Fill the cupcake liners 2/3 full. Bake 15-18 minutes or until a toothpick inserted in the center comes out clean. Do not over bake. Once the cupcakes are cool you can either put the jelly into a piping bag with a decorating tip thats small enough to directly insert into the cupcake and pipe it that way. Or you can cut out a hole where the jelly will go (which is what I did). For mini cupcakes the back side of a decorating tip works well at getting the right size hole. For standard size cupcakes an apple corer works well. Decorate with frosting recipe (below).


Peanut Butter Frosting Ingredients & Garnish:

  • 3/4 cup smooth peanut butter.
  • 3/4 cup (1 1/2 sticks) unsalted butter, softened.
  • 1 tablespoon vanilla extract.
  • 3 cups confectioners(powdered) sugar, sift if you are able to.
  • 3 tablespoons milk (butter milk is optional)
  • Mini Nutter Butter cookies for garnish
  • Unused jelly, for piping a dollop on top of the frosting. 
Combine the peanut butter, butter and vanilla in a medium bowl. Using an electric mixer beat until light and fluffy, about 1 - 2 minutes. Add the confectioners sugar along with the milk, and beat until well combined. Pipe frosting onto cupcakes using your preferred decorating tip or a ziploc bag with a corner cut off. Top with a dollop of jelly and a mini Nutter Butter cookie.

Thursday, April 19, 2012

Cookie-Brownie Peanut Butter Cup Surprise!

These are definitely meant to be eaten with a glass of milk at the ready. I modified a recipe I saw on a friends Pinterest stream recently. I took them from full-size to mini form, and I am glad I did. As a full size one of these babies would definitely not be digestible in one sitting.

Here's what you need:

  • 2 packages of refrigerated cookie dough 
(the kind you break off in pre-scored pieces) I choose to use Toll House Mini Chocolate Chip Cookie Dough.


  • 1 box brownie mix of your choice
(plus everything needed to make said Brownie Mix) I choose Pillsbury Milk Chocolate


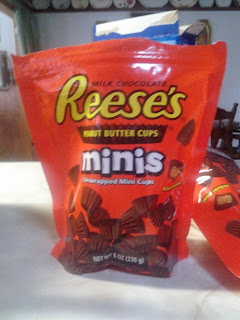
  • 1 Bag of Mini Reeses Peanut Butter Cups
(You could essentially use any mini peanut butter cups, Trader Joes makes some that are just as good if not better than Reese's)


  • Either mini cupcake pans or brownie bite pans


  • Flour or Butter Cooking/Baking Spray
(this is a must as I forgot the spray on the last pan I put in the oven and they would not come out of the pan. The tops popped off and I was stuck scraping out the bottom)


Here's what you do:

  • Make the brownie mix per package instructions.
  • Spray the pans you are going to use with the cooking/baking spray
  • Cut the cookie dough on the score lines. I tried breaking it apart by hand but it wasn't coming apart evenly, so I began just cutting it. 
  • Put one square piece of cookie dough into the bottom of each well in the pan. Press the dough into the bottom of the pan evenly.
  • Next place one mini Reese's peanut butter cup in each well on top of the cookie dough.
  • Pour brownie mix in each well, do not fill completely or they will bake up over the top. While the brownie mix will cover the peanut butter cup you should still be able to see the form of the top of it raised in the center.
 
  • Bake in a 350 degree oven for 14-15 minutes. Unfortunately because of the peanut butter cup in the center you can't stick a toothpick in to see if its done. You will have to go more by look and feel to tell that they are done.
  • Let them cool in the pan about 5 minutes before popping them out with a knife, cutting around the sides to ease them out.
  • Rinse/wipe out pan before re-using, dry, and then re-spray with the cooking/baking spray before re-loading with more.
  • I just kept making them until I was out of brownie mix. I used a little over 1 package of cookie dough, the whole thing of brownie mix and about 3/4th's of the bag of peanut butter cups.

Delicious, but super rich! A great baking project for the kids to help you with as the cookie dough and peanut butter cup part are very easy to do.     Enjoy!

Wednesday, November 23, 2011

Baking Cookbooks

I love acquiring baking cookbooks... well good baking cookbooks that is. I hate those ones that only have a couple recipes that interest you. Anyhow, a couple weeks ago I bought this cookbook (which is not just baking related), Carnations EASY-DOES-IT Cookbook.
Reading through it has been the funniest thing! First off, the publishing copyright is 1958. Which should tell you a little about what is to be found inside. In complete it reads as a 'house-wife primer', how the little lady can make her daily life/chores easier for herself. And thus I would like to now list some of my favorite lines:

"Take a tip from your husband. Run your home as efficiently as he runs his office! Over 1,000 meals a year makes you a B.H.E (thats short for Big Household Executive) in your kitchen."

"If Men could change the time-honored wedding ceremony, some of them might suggest, "Love, honor and make good gravy!" Keep lumps out of your gravy!"

"BE AFRAID TO EXPERIMENT!"

"How Did Folks Manage to Entertain B. TV (before television?)"

"Sooner or later, every husband has an attack of barbecue-itis. Properly encouraged, this disease guarantees you a summer vacation from the kitchen!"

"Children and guests are seldom at their best in adult party surroundings. Isn't your party the time to have youngsters greet guests they know, and then disappear, or have dinner quietly by themselves?"

"You're not just impressing your family....every day, at every meal, you're making memories for them."

I had a laugh at the cookbook. It doesn't have the greatest sounding recipes, but as a cookbook collector I felt the need to have it anyways.

I found some other baking cookbooks at the library that I really really want to have in my own personal collection as well. These are:

Martha Stewart's Cookies
Hello! Its Martha Stewart Related, of course its going to be Fabulous!

Duncan Hines: Cake Mix Magic 2
Um, Cake Mix Magic 2? Is there an original Cake Mix Magic as well? I looked for it at the library, but alas, they had no such thing. This is an amazing resource. Sometimes I can get cake mixes really cheap, and this has lots of recipes to liven up the basic box mixes.

Pillsbury: Holiday Baking
Holidays included in this book are: Halloween, Thanksgiving, Christmas, Hanukkah, Kwanzaa and New Years. Mainly its filled with sweet treats to make, but also sprinkled in are some party appetizers as well. Hello! Who wouldn't see the Peppermint Whoopie Pies on the front cover and not want to own this cookbook? Also I have seen many cookbooks recently for Whoopie Pies... so I guess they are making a comeback. Either way any cookbook about or including Whoopie Pies is tops in my book.

Thats it for this post. I will hopefully have some time tomorrow to write a post for the cake(s) I made today (well made most of anyways, I will put the topping on them tomorrow before consumption at Thanksgiving Dinner)

Happy Thanksgiving to You and Yours!

Monday, November 21, 2011

Chai Spiced Tea Loaves with Mini Semi-Sweet Chocolate Chips


I have taken a month long break from the blog, but now I am back. My grandfather passed away a month ago and after that I put all my stuff in storage, moved in with my grandmother to keep her company & pay off the few bills I have. I also found a job in the month I have been away.

Today I am back at the baking! Thanksgiving is in a few days and I decided to bake a couple different things for the occasion.  Today I made Chai Spiced Tea Loaves with Mini Semi-Sweet Chocolate Chips. A few years ago I actually made the Tea Loaves (minus the chocolate chips) for the first time. They were the best things I made that Christmas from the Smorgasbord of goodies I tried my hand at.

This time I decided to add in some mini chocolate chips to give a sweet little punch to the delectable tea loaves.

Tea Loaves:
1/2 cup water
1 tea bag (black tea)
3 cups All Purpose Flour
2 teaspoons Chai Spice Blend
1 teaspoon Baking Powder
1/2 teaspoon Baking Soda
1/2 teaspoon Salt
3/4 cup Vanilla Low-Fat Yogurt
2 sticks Butter (softened)
1 cup sugar
1 cup (packed) light brown sugar
5 large eggs
(I also added in 3/4 cup to 1 cup mini semi-sweet chocolate chips)
Glaze Topping:
1 tablespoon water
1 cup Powdered Sugar
 
Pre-Heat oven to 350 degrees and grease & flour 6 mini loaf pans

Microwave 1/2 cup water for 1.5 to 2 minutes. Steep Tea Bag in Water.

In Medium Bowl Combine Flour, Chai Spice, Baking Powder & Soda, and Salt.

In Small bowl mix yogurt with 1/3 cup of the cooled tea.

In a Large bowl, with mixer on medium, beat butter until creamy (about 1 minute).Gradually beat in both sugars. Beat 2 minutes, until fluffy. Reduce speed to low, beat in eggs 1 at a time until well blended. Beat in a little of the flour mix, alternating with a little of the yogurt mix until both are just combined in the butter mix. (At this point I stirred in the chocolate chips). Spoon batter evenly into the mini loaf pans.

Bake 30 - 35 minutes, until a toothpick inserted into the center of the loaves comes out clean. Cool loaves 15 minutes and then remove from pans and cool on racks for 2 hours.

Mix the glaze topping items together and drizzle over the top of the loaves (best if done while on the wire cooling racks with wax paper underneath or even with the loaves just sitting on wax paper themselves)

These loaves can be pre-made and then wrapped in parchment paper, put in ziplock bags and frozen until later (probably no more than 6 months though).

Friday, October 14, 2011

Mini Snickerdoodle Cookies w/Chocolate Glaze Drizzle

Snickerdoodle cookies are very tricky to make. It's a 'wet' dough that sticks to everything! It has to be chilled (I chose to freeze it rather than refrigerate the dough as that kept it solid long enough for me to work with it) before you can bake it. The Recipe I used was as follows:

Ingredients:
*1 cup butter (I substituted margarine)
*1 1/2 cups sugar (I have made them with both regular sugar and brown sugar)
*2 large eggs 
*2 3/4 cups flour
* 2 teaspoons cream of tartar 
*1 teaspoon baking soda 
*1/4 teaspoon salt
*3 tablespoons sugar (Again you can decide regular or brown sugar)
*3 teaspoons cinnamon

Directions:
    Mix butter (or margarine), 1 1/2 cups sugar and eggs thoroughly in a large bowl with a hand mixer.
    Combine flour (which should be sifted), cream of tartar, baking soda and salt in a separate bowl.
    Blend dry ingredients into butter mixture.
    Chill dough, and chill an ungreased cookie sheet for about 10-15 minutes in the fridge. When you put the dough in to chill preheat the oven to 350 degrees.
    Meanwhile, mix 3 tablespoons sugar, and 3 teaspoons cinnamon in a small bowl. (you can use less cinnamon according to taste)
    Scoop 1-2 inch balls of dough, place in the sugar/ cinnamon mixture. (1 inch balls make mini cookies)
    Coat by gently rolling balls of dough in the sugar-cinnamon mixture.
    Place on chilled ungreased cookie sheet, and bake 10 minutes.
    Remove from pan immediately.
After the cookies had fully cooled I took some Duncan Hines Chocolate Amazing Glaze (http://www.duncanhines.com/products/glazes) microwaved it as instructed, then with all the cookies very close together on several overlays of wax paper, drizzled the glaze across the cookies. Store in a covered container, stacking won't be possible with the glaze as it remains sticky. You may also want to refrigerate before traveling with them, I did.
                                                                           Enjoy! ~ Sarah E. Lynch

I Bake, Therefore I Am!

I will tell you right from the start, I am not a talented writer. I've written my fair share of poetry and greeting card-esque passages, all decently prosed. But when it comes to writing news articles, stories, novels, etc... Well I leave a lot to be desired to say the least. 

But something I can do fairly well is Bake. Now don't take that the wrong way, that is to say, I can't cook. Well I can cook a slight number of things, but not enough to make a whole weeks worth of decent, edible meals. But when I bake something in the universe upends itself and allows me to make some delicious treats without me knowing exactly how I am capable of baking and following detailed recipes, but not being able to cook detailed meals.

Yesterday I was at Goodwill and looking through the cookbooks. I love finding cookbooks solely about baking, I have begun to have a slight addiction to buying them. Well of course yesterday was no different. I found two books I just had to have. The first (and the one I am most excited about): Gourmet's Best Desserts. The second: Readers Digest; Cakes, 1,001 Classic Recipes from Around the World.

Gourmet Best Desserts was published in 1987. Looking through the 500-odd pages I am feeling slightly daunted. I am in no way a professional baker or pastry chef, and many of those recipes are very detailed and intricate. But also the book includes tips, tricks, explanations of techniques that you are going to need to use. So I am excited to dive in and attempt most of the recipes on my own.


Cakes, 1,001 Classic Recipes was published in 2003. And its pretty much your straight forward recipe book. No tips, tricks or techniques listed for information on how to perform said recipes. But a good cookbook I think to have for reference when needing to make someone a sweet treat for a special occasion.

For awhile now this Blog has sat lonely and empty. I couldn't figure out just what to blog about. But right now all I can think about is baking. I've wanted to own my own bakery or bakery styled food cart for a year or two now. But as I am not anywhere close to be being in a position to having either of those things, this Blog will have to do for now. I guess it will be my baking journal of sorts. Right now I only mainly have the web cam for pictures, so most pictures I will include for now will be lower quality than I would like. But hopefully sooner rather than later I will be able to purchase a camera.


So thats my Blog entry for today. Short and Sweet. Check back later for updates on how my self-taught baking lessons are going!
                                                                                                       ~Sarah E. Lynch